投稿

bookmarkletからクリップボードへ タイトルとURLリンク wordpress記事内リンク

Quick Edit Pencil
参考にした情報
WebページのタイトルとURLをワンクリックでコピーするBookmarklet - Qiita

ワードプレスの記事リンク生成に変更

//HTMLリンク作成ブックマークレット

javascript: var global = window;
global.COPY_TO_CLIPBOARD = global.COPY_TO_CLIPBOARD || {};
global.COPY_TO_CLIPBOARD.getUrlInfo = function() {
    var a = new String(document.title);
    a.allReplace = function(a) {
        var b = this,
            c;
        for (c in a) b = b.replace(new RegExp(c, "g"), a[c]);
        return b
    }.bind(a);
    return "<a href='" + document.URL + "' target='_blank' rel='noopener'>" + a.allReplace({
        ":": "\uff1a",
        "\\[": "\uff3b",
        "\\]": "\uff3d"
    }) + "</a>"
};
global.COPY_TO_CLIPBOARD.copyToClipboard = function() {
    var a = document.createElement("textarea");
    a.textContent = this.getUrlInfo();
    var d = document.getElementsByTagName("body")[0];
    d.appendChild(a);
    a.select();
    var b = document.execCommand("copy");
    d.removeChild(a);
    return b
};
global.COPY_TO_CLIPBOARD.copyToClipboard();


//リンク先管理エクセル用テキストとHTMLリンク作成

javascript: var global = window;
global.COPY_TO_CLIPBOARD = global.COPY_TO_CLIPBOARD || {};
global.COPY_TO_CLIPBOARD.getUrlInfo = function() {
    var a = new String(document.title);
    a.allReplace = function(a) {
        var b = this,
            c;
        for (c in a) b = b.replace(new RegExp(c, "g"), a[c]);
        return b
    }.bind(a);
    return a.allReplace({
        ":": "\uff1a",
        "\\[": "\uff3b",
        "\\]": "\uff3d"
    }) + "\t" + document.URL + "\t" + "<a href='" + document.URL + "' target='_blank' rel='noopener'>" + a.allReplace({
        ":": "\uff1a",
        "\\[": "\uff3b",
        "\\]": "\uff3d"
    }) + "</a>"
};
global.COPY_TO_CLIPBOARD.copyToClipboard = function() {
    var a = document.createElement("textarea");
    a.textContent = this.getUrlInfo();
    var d = document.getElementsByTagName("body")[0];
    d.appendChild(a);
    a.select();
    var b = document.execCommand("copy");
    d.removeChild(a);
    return b
};
global.COPY_TO_CLIPBOARD.copyToClipboard();


JavaScriptのワンライナーの難読コードを、改行付き可読コードに変換してくれるサービス
Online JavaScript beautifier

Blender: 辺の長さを数値で指定するアドオン

Quick Edit Pencil
二つのアドオンが見つかりましたが、開発者は同じの方のようです。

二つ試しましたが、どちらも便利に使うことができます。とても重宝します。

距離が入力できるアドオン(2.7用)
ブレンダーで設定した単位が反映、単位(m,cm,mm)を入力値で指定可能、入力値にスケールは反映されない

mesh_edges_length.py (ver1)

mesh_edges_length_unstable.py (ver2)

ダウンロード
blender_addons/mesh_edges_length.py at master · peppelinux/blender_addons · GitHub


距離と角度が入力できるアドオン(2.7用)
ブレンダーで設定した単位が反映、単位(m,cm,mm)を入力値で指定不可能、入力値にスケールが反映される。

mesh_edges_length_angle_yi.py

ブレンダーフォーラム
[Addon] Directly Set Length(edge) and Angle(edges) [v0.2]

日本語の情報

Blender Addon Review: 辺の長さを数値入力で設定できるアドオン(Directly Set Length(edge) and Angle(edges)) – CGrad Project

お気に入りの設定


正規表現 全角文字で挟まれた半角スペースを削除

Quick Edit Pencil
([^a-zA-Z]) ([^a-zA-Z])


置換は後方参照で

$1$2

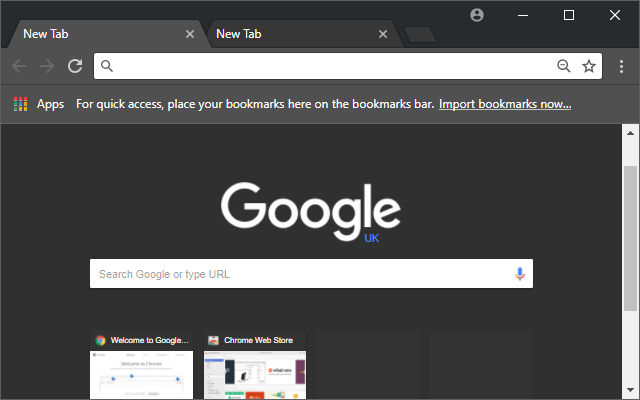
Chrome Theme 自作する

Quick Edit Pencil
Themeファイルの作成は下記がベストです。

テーマ/作り方 - Google Chrome まとめWiki


manifest.jsonの記述内容については下記が参考になります。

The 'manifest_version' key must be present and set to 2 (without quotes). See developer.chrome.com/extensions/manifestVersion.html for details.

{
   "description": "",
   "key": "MIIBIjANBgkqhkiG9w0BAQEFAAOCAQ8AMIIBCgKCAQEAqj0a9p34y8fmKf2nhO1tYSbm/iOpme4h1+rtCAODnwlWijM3MKoMpmdrsGoV8Z7IxxLxsnf8FKOuxcM4DcmXrAdDpSsYdnzR3PVU+bcfQgWAwFqEBKthGOLX6igIOWHdr5aXrpsuf91s4AWrW+4QjmkDk/FpISxXvaWMiADrT5N+jeWxcNRxgwmCuWCRWwaJbHDmEl6CdbrINLM7eAYzxJA7945Ad9ywHWR263YgS0vDEwOVt0ogrn4l3cKtfm0tGwvrq4ef+ehJ7OhHQ76TbKhl9nV18UiAt22hwF5AZ4628A2ySURLEFENvn05UU3CackCmHFXL1+JNpV2Bixe9QIDAQAB",
   "manifest_version": 2,
   "name": "Midnight Chrome",
   "theme": {
      "colors": {
         "bookmark_text": [ 170, 170, 170 ],
         "button_background": [ 38, 38, 38, 1 ],
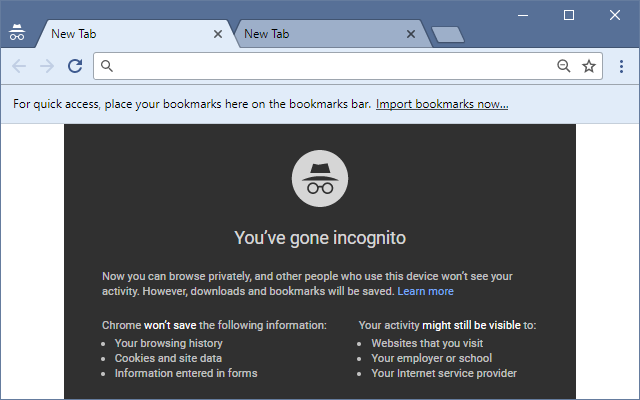
         "frame_incognito": [ 255, 255, 255 ],
         "ntp_background": [ 25, 25, 25 ],
         "ntp_text": [ 255, 255, 255 ],
         "tab_background_text": [ 170, 170, 170 ],
         "tab_text": [ 255, 255, 255 ],
         "toolbar": [ 43, 43, 43 ]
      },
      "images": {
         "theme_ntp_background": "images/theme_ntp_background.png",
         "theme_tab_background": "images/theme_tab_background.png",
         "theme_tab_background_incognito": "images/theme_tab_background.png",
         "theme_tab_background_v": "images/theme_tab_background.png",
         "theme_toolbar": "images/theme_toolbar.png"
      },
      "properties": {
         "ntp_background_alignment": "top",
         "ntp_background_repeat": "repeat-x"
      },
      "tints": {
         "buttons": [ 0, 0, 1 ]
      }
   },
   "update_url": "https://clients2.google.com/service/update2/crx",
   "version": "1.0.3"
}

green plants theme


ディレクトリ一覧


Powershell で URL webアドレスを開く

Quick Edit Pencil
デフォルトのブラウザーで開きます

start ‘https://docs.microsoft.com/ja-jp/powershell/’

powershell script to open web address URL with default browser | LockeVN aka walker in the coding cloud

Powershell: sendtoショートカットの先頭にコピペするおまじない

Quick Edit Pencil
PowerShell -ExecutionPolicy RemoteSigned -File


# ディレクトリ
<#[ 右クリック-送る ]に登録するには 送るフォルダを開く - Explorerのアドレスバーに shell:sendto 作成したスクリプトのショートカットのプロパティのリンク先の先頭に下記 を追記すると$argsでパスが取れる PowerShell -ExecutionPolicy RemoteSigned -File "リンク先パス"#>


C:\Windows\System32\WindowsPowerShell\v1.0\powershell.exe -ExecutionPolicy RemoteSigned -File "E:\OneDrive\ドキュメント\WindowsPowerShell Scripts\Image Resize.ps1"

C:\Windows\System32\WindowsPowerShell\v1.0\powershell.exe -ExecutionPolicy RemoteSigned -File "E:\OneDrive\ドキュメント\WindowsPowerShell Scripts\保存画像をインスタで開く.ps1"

Windows 10で、Explorerのナビゲーション ウィンドウの表示/非表示を、キーボードショートカットで切り替える方法

Quick Edit Pencil
AutoHotkeyを使いキーボードショートカットを割り当てます。AutoHotkeyについては最後に説明。

AutoHotkeyをインストールします。

メモ帳で次のコードをコピペして保存します。
任意の名前.ahk
とりあえずデスクトップに保存しダブルクリックして実行します。

/*
Author:  
Date:    
Contact: 
*/

#NoTrayIcon
#Persistent
#NoEnv
#SingleInstance, Force

#IfWinActive ahk_class CabinetWClass
#z::
Send !v{n}{enter}

エクスプローラーをアクティブにして Winキー + z でナビゲーション ウィンドウの表示/非表示を切り替えられます。

ウインドウズエクスプローラーにはナビゲーション ウィンドウの表示/非表示を切り替えるショートカットは提供されていないため、キーボードから操作するならば次のようにキーを組み合わせて実行するしかありません。

エクスプローラー>Alt>v>n>Enter

このキーの組み合わせをAutoHotkeyを使いExplorerがアクティブな時にWin+zに割り当てます。(リマップする)。このスクリプト(マクロ)が上記のコードです。リマップ - AutoHotkey Wiki

ちなみにエクスプローラー標準のショートカットでは Alt+p でプレビューパネル
Alt+Shift+p で詳細パネルの表示/非表示を表示できます。

AutoHotkeyとは

ユーティリティソフトで、ユーザーがマクロ言語を記述して実行するとこで様々な機能を拡張することができるスクリプトエンジンです。AutoHotkey本体を実行してもヘルプしか出てきません。

AutoHotkey ダウンロード

AutoHotkey - Wikipedia 日本語

windows 7 - Keyboard shortcut to hide/show Explorer navigation - Super User